Here you will find instructions on how to work with sources of Morevna Episode 3.
Downloading sources
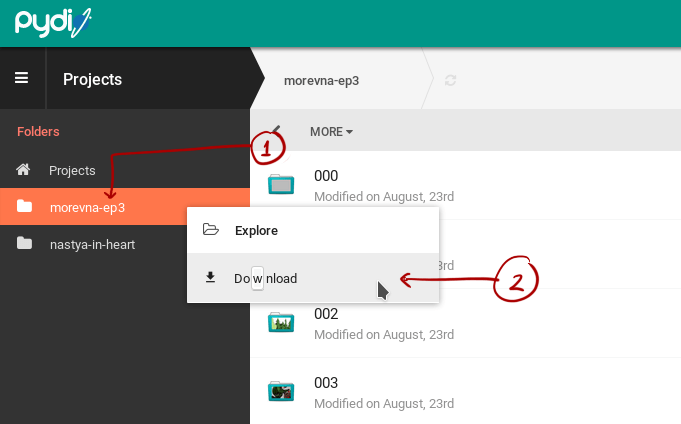
1. Web interface
You can browse source files using web interface. This is preferred way if you want to get individual files.
2. Rsync
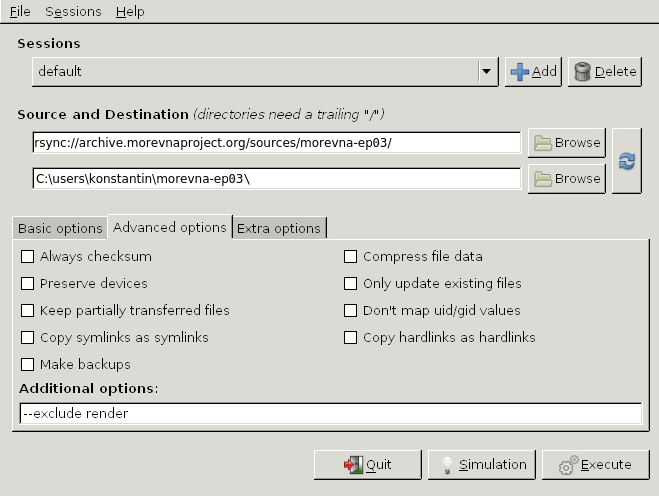
If you wish to get all source files, then it is best to download using Rsync utility. The reason for this is that our web server is not be able to handle large downloads properly, while with Rsync you are 100% safe and can even resume download if connection gets broken.
So we have configured our server to provide sources via Rsync with the following URL:
rsync://archive.morevnaproject.org/sources/morevna-ep03/
On Linux you can use the following command to get the sources (assuming that you have «~/morevna-ep03/» directory created):
rsync -avz --exclude render rsync://archive.morevnaproject.org/sources/morevna-ep03/ ~/morevna-ep03/
Windows users can get sources using GRsync utility:
3. GitLab
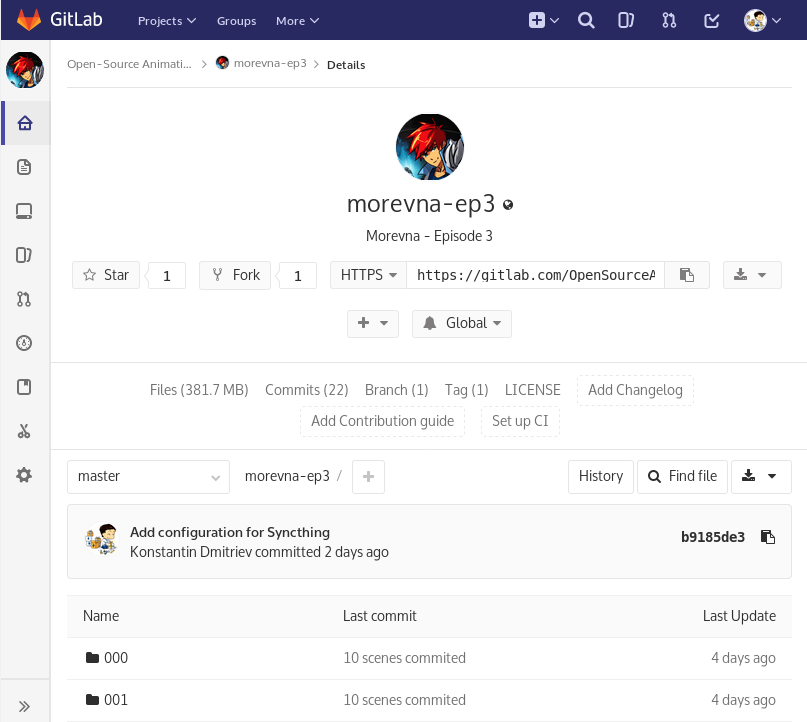
For those users who are familiar with Git (and possibly want to contribute back) we provide a repository at GitLab — https://gitlab.com/OpenSourceAnimation/morevna-ep03/. Please note, that you need to have Git LFS extension installed before you start cloning.
When everything is downloaded
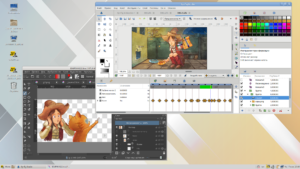
When download is complete you can try to open animation .sif files, but you will see that most of them have a lot of image layers missing. This is because sources archive does not contains rendered data. So, you need to rebuild it using RenderChan tool.
The same happens with Blender Video Editor: Blender cannot import Synfig animation files directly. So, Synfig files are converted to AVI files and then inserted into Blender.
With our automated build system we do not need to keep intermediate PNG and AVI files in the archive — they can be rebuilt automatically by user any time.
Software
To rebuild the rendered data you need the following software installed:
- RenderChan.
- Synfig (version 1.1.12 or above).
- Blender (version 2.77).
- Krita (version 2.9.x or above).
- If you want to edit lipsync PGO files, then you will need Papagayo.
Make sure to have all mentioned tools are available in your system PATH.
Rendering dependencies
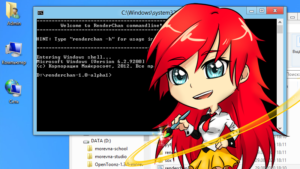
To rebuild all dependent files for particular file just call the following command from terminal window:
renderchan --deps FILE
For example, here is how to build rendering data for shot 001:
renderchan --deps ~/morevna-ep3/001/001.sifz
Rebuild rendering data for video editing file:
renderchan --deps ~/morevna-ep3/ep03-en.blend
Exploring the main project file
Now you can open video sequence file (ep03-en.blend) and examine its contents. At first glance the amount of tracks might look scary, so here is a quick breakdown:
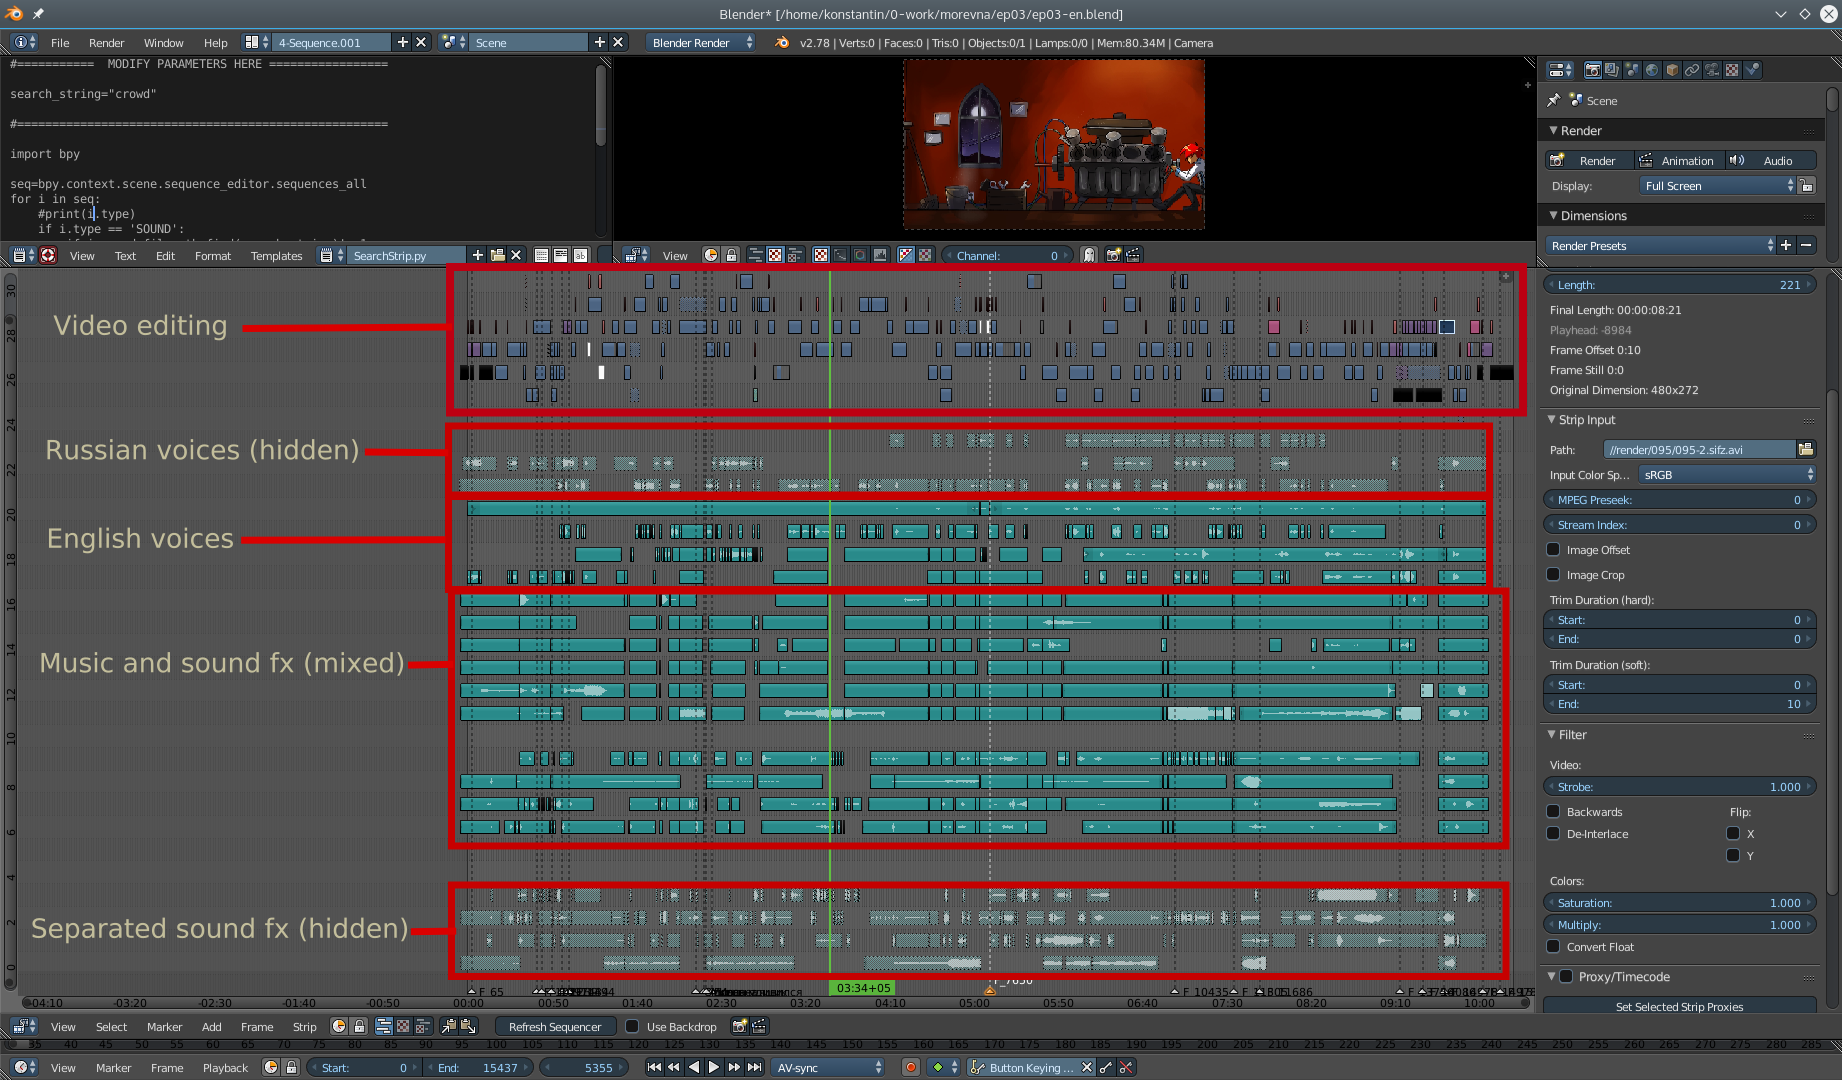
You can see top tracks are video strips. And everything at the bottom is for audio.
Top 3 audio tracks (channel numbers 22-24) are hidden — they contain Russian voices (as they were reference for creating English version).
Next 4 tracks from top (channel numbers 18-21) contain English voices.
Below is a group of tracks with music and sound FX. They are all have proper levels already set, so they mix up together well.
The last 4 hidden tracks are duplicate the sound FX from above, but here they are presented at their unmixed state. We need them here for reference, to track the original files for every effect. This is required because most of those effects are retrieved from freesound.org, so we need to properly attribute all authors. By keeping original files here, we do need to track every effect file by hand — we have a nice automatic script for that:
renderchan-manager --attribution ~/morevna-ep3/ep03-en.blend
Rendering animation
With RenderChan automated build system it is also possible to render any file in the project. Just use it without «deps» option:
renderchan FILE
For example:
renderchan ~/morevna-ep3/001/001.sifz
will render all dependencies for shot 001 and then render it into AVI file. The result will be placed in «~/morevna-ep3/render/001/001.sifz.avi».
In the same way you can render full video sequence:
renderchan ~/morevna-ep3/ep03-en.blend
This might take significant time, because it will render all dependent animation files if they aren’t rendered yet (or their rendering is not up to date). The result will be placed in «~/morevna-ep3/render/ep03-en.blend.avi».
By default the rendering will be made for 480×270 output resolution. Working with this draft resolution allows to save time when doing multiple re-renderings (this is an often case for intensive work). In this mode the dimensions of source artwork images are reduced, this is why some images might appear blurry.
For the final output you can use «—profile» option to choose different resolution profile:
renderchan --profile full-hd ~/morevna-ep3/ep03-en.blend
For the full list of profiles and their options check «~/morevna-ep3/project.conf» file.


3 ответа