1. Software
To work with sources of Morevna Episode 4 you need the following software installed:
- RenderChan.
- Synfig (version 1.3.14 or above).
- Blender (version 2.79).
- Krita (version 4.2.7 or above).
- Papagayo (only if you want to edit lipsync PGO files).
Make sure to have all mentioned tools are available in your system PATH.
2. Downloading sources
Although full sources of Morevna Epiosde 4 are available via web interface, the best way to obtain them is to use Rsync.
The reason for this is that our web server might not be able to handle large downloads properly (5+ Gb, that is) while with Rsync you are 100% safe and can even resume download if connection gets broken.
On Linux you can use the following command to get the sources (assuming that you have «~/morevna-ep04/» directory created):
rsync -avz --exclude render rsync://archive.morevnaproject.org/sources/morevna-ep04/ ~/morevna-ep04/
Windows users can get sources using GRsync utility:
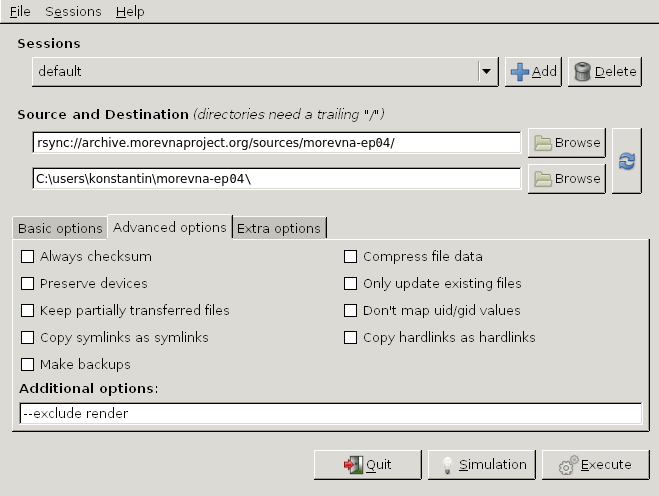
3. Editing scenes
Okay, you’ve got everything downloaded. Now let’s try to open something!
For example, go to dir named «105» and try to open «105-ivan.kra». You will see the following:

If you need only Krita files, then you do not need to do any further steps — just open some KRA files and enjoy.
But if you’ll try to open some Synfig or Blender scenes, then you will see something weird.
For example, let’s go to directory number «150» and open file «150.sifz».
You’ll see something like this:

It’ is almost… empty! You’ll see something like this for almost all other scenes.
«What’s wrong here?» — you think. Did creators of Morevna tricked you and published incomplete sources?
Of course not.
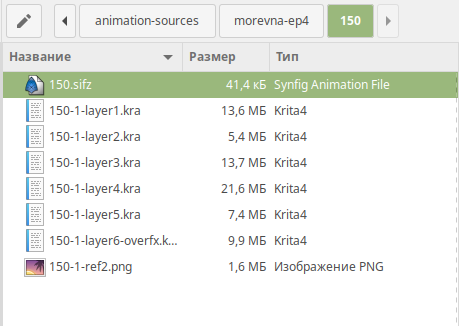
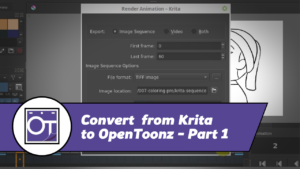
This is because Synfig (and Blender) scenes are referencing Krita’s files (you can see them in same dir). But since Synfig cannot import Krita files directly, those files should be converted to some intermediate format first (we use PNG).

The process of conversion is automated — it is handled by RenderChan tool. Just run the following command from terminal window:
renderchan --deps ~/morevna-ep04/150/150.sifz
This command will examine given file, find all referenced files that require conversion and convert them.
After command finishes, open «150.sifz» file again and see how it looks now:

Hey, it is much better now! Just like in original movie. ^__^
So, remember: before opening any scene for the first time, make sure to run the following command:
renderchan --deps PATH_TO_SCENE_FILE
Also, remember another thing: if you have changed any referenced Krita file, then you will need to re-run this command again to update converted files.
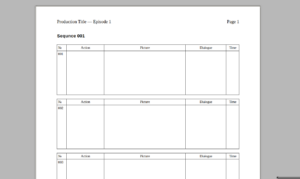
4. Editing sequence file
Okay, now we know ho to edit individual scenes. But how about the whole sequence?
Let’s go ahead and open «ep04-v24-ru.blend» file in Blender — this is where all scenes are composed together.

And again, after opening the file it shows no image (and doesn’t plays any sound).
Feels similar?
Exactly. Blender cannot import Synfig scenes directly, so we need to convert (render) them to some readable format (this time we will use avi video with lossless H.264 codec).
Again, RenderChan for the rescue!
You can render all referenced scenes using the same command as before:
renderchan --deps ~/morevna-ep04/ep04-v24-ru.blend
This command will take much longer, because converting (rendering) each scene is really resource-consuming process. It takes about 4-5 hours on my configuration of 8-core i7-2600K@3.4 Ghz. Also, you will need enough RAM — 16 Gb should work fine.
After rendering completed you can re-open file and see all images and sounds in place.
The amount of tracks can be a bit scary, so here is a quick breakdown:

Below is a group of tracks at the top are audio tracks with voices, music and sound FX. They are all have proper levels already set, so they mix up together well.
The group of hidden tracks at the bottom are duplicates of sounds from above. Those are source (raw) sounds, presented at their unmixed state.
One of the reasons to have them is to track original files for every sound effect. This is required because most of those effects are retrieved from freesound.org, so we need to properly attribute all authors. By keeping original files here, we do need to track every effect file by hand — we have a nice automatization for that:
renderchan-manager --attribution ~/morevna-ep04/ep04-v24-ru.blend
5. Adding your modifications
If you edited some scene (or even dependent KRA file), then you can automatically update rendered (converted) videos by running the same command:
renderchan --deps ~/morevna-ep04/ep04-v24-ru.blend
This time, the process will not be a long wait, because it will take into account previously rendered files and render changed files only.
Those who familiar with software development will find that this process is very similar to building apps from source code: you have source files and build system detects what’s changed and generates binary file for you. This works exactly the same way.
6. Final output
Notice, that by default all video files are rendered in low-resolution mode — you’ll get resolution at 480×270. This allows to save time when doing multiple re-renderings (this is an often case for intensive work) and have faster updates when working with final editing (Blender might get very slow when working with complex editing at big resolutions). In this mode the dimensions of source artwork images are reduced, this is why some images might appear blurry.
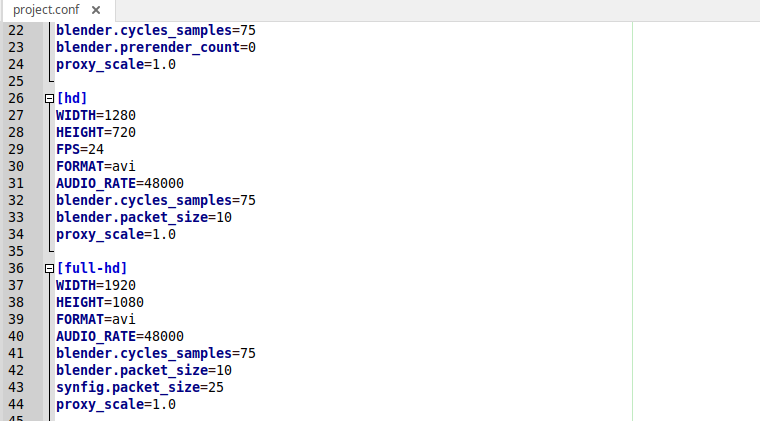
For the final output you can render in high resolution and this can be done automatically — just use «profile» option to choose different resolution profile:
renderchan --deps --profile full-hd ~/morevna-ep04/ep04-v24-ru.blend
For the full list of profiles and their options check «~/morevna-ep04/project.conf» file.
Also notice that if you do rendering in high resolution, that will not delete your previous data, which you rendered in low resolution. So you if you will decide to go back to low-resolution, then you can run same command, without «profile» option:
renderchan --deps ~/morevna-ep04/ep04-v24-ru.blend
…and this will not take much time again, because it will reuse the data you rendered earlier.
So, when you are done rendering for both profiles you can switch between them in literally no time.
7. Final words
Well, that’s all! I hope that this article will help you to reuse the sources of Morevna Episode 4 and create your own awesome works with free software toolchain. If you have any questions or got an awesome remix to share – feel free to drop a comment below!


2 ответа
Awesome ! Thanks a lot for this tutorial, your pipeline is stunning ! I will definitively use some of the tools you’ve talk about to improve our workflow back home !